.svg)
Citrix NetScaler 14 Gateway VeroCard Integration Guide
Pre-requisite steps (before upgrading NetScaler)
This section is applicable if you are upgrading from a previous version of the VeroGuard Theme
In the NetScaler Gateway administrative interface, navigate to Configuration > Citrix Gateway > Global Settings. Click Change Global Settings.
Select the Client Experience tab and change the UI Theme drop-down option back to Default. Click OK to apply the change.
Delete the directories
/var/ns_gui_customand/var/netscaler/logon/themes/customfrom the NetScaler Gateway, as they are no longer in use. You can do this via SSH or WinSCP.Save the NetScaler Gateway configuration.
Ensure the UI Theme has been set to Default before removing these files or the Gateway and Admin UI will be unavailable.
Reboot NetScaler Gateway appliance.
Navigate to the Citrix Logon page and confirm that the default login page is now displayed.
Older versions of the VeroGuard package, customtheme.tar.gz, are not compatible with NetScaler 14. To avoid issues, it is essential to remove the package before upgrading to NetScaler 14.
Failure to do so may result in the NetScaler UI becoming unavailable or unusable after the upgrade.
Installation Part 1: Binding a Theme to The Server
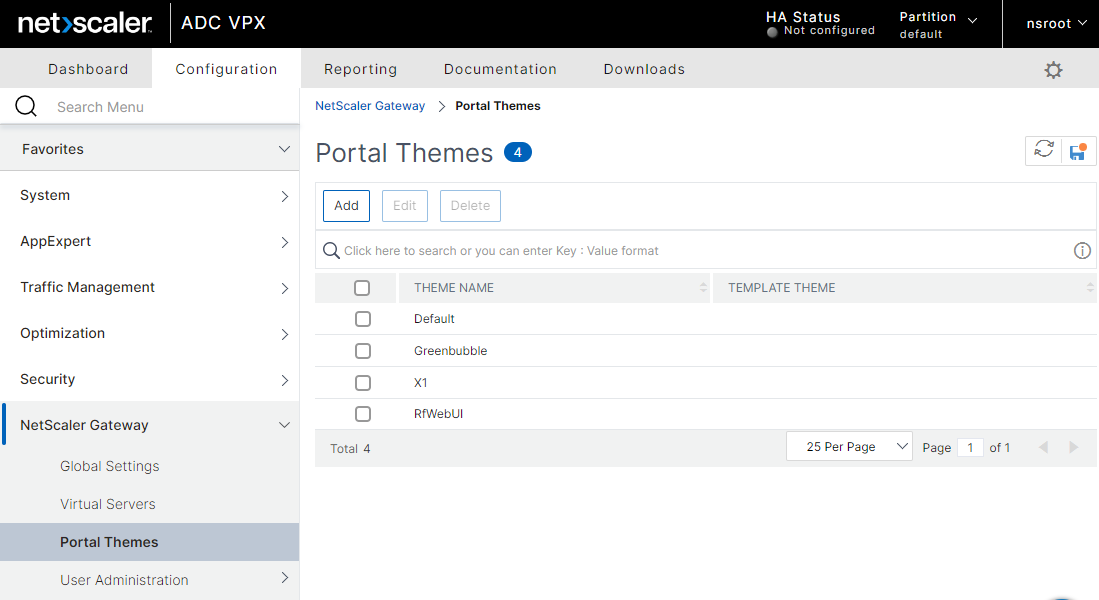
In the NetScaler Gateway administrative interface, navigate to Configuration -> NetScaler Gateway -> Portal Themes and click the Add button.
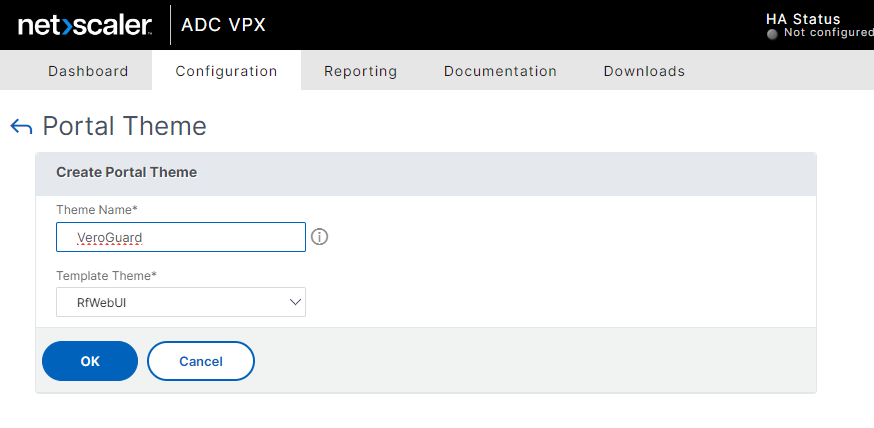
Enter a Theme Name, e.g. VeroGuard, ensure RfWebUI is selected from the drop-down as the Template Theme and click the OK button.
A theme configuration screen similar to the one below will be displayed.
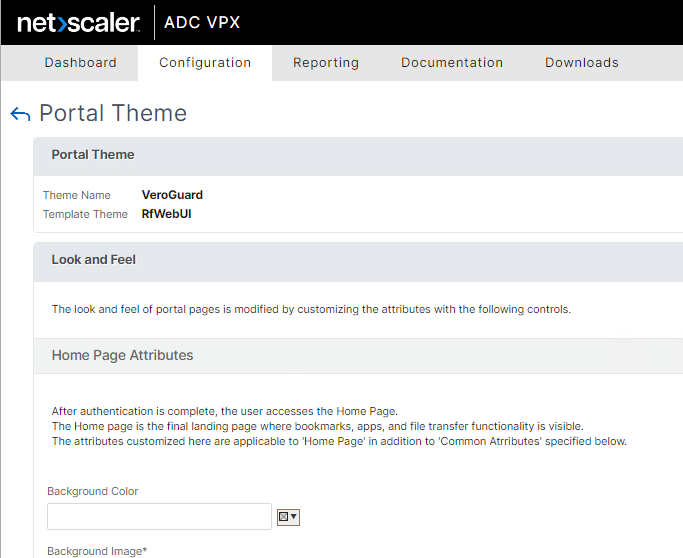
You can make any desired changes to the look and feel or leave the default settings. Once you've finished configuring, scroll to the bottom of the screen and click the OK button.
A theme review screen similar to the one below will be displayed.
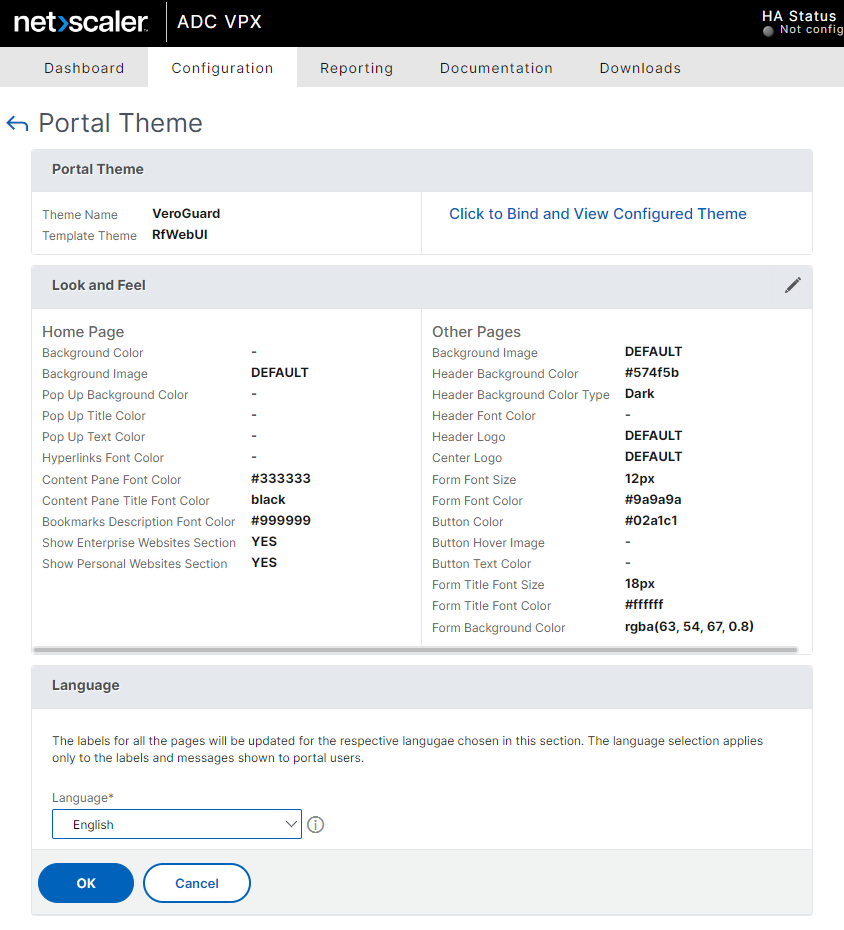
Navigate to the Click to Bind and View Configured Theme option and click on it. A pop-up similar to the one below will appear.
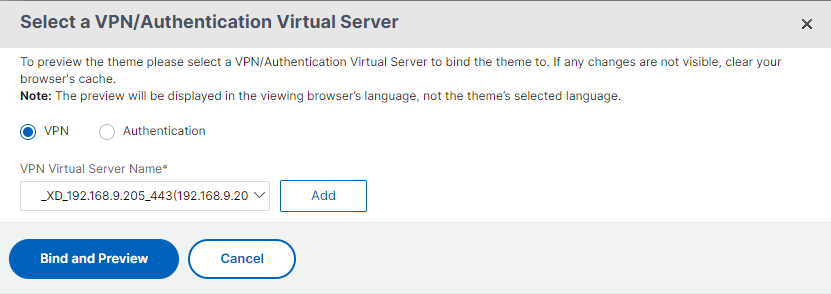
Choose VPN option. Select the VPN Virtual Server Name from the drop-down for the device on which you wish to change the theme and click the Bind and Preview button.
A pop-up window will open with a preview of your Citrix StoreFront login page. At this point, the login page may appear unchanged from the original, without any VeroGuard login facility. This is normal. Close the preview window and click the OK button on the Portal Theme screen.
The OK button will be replaced with a Done button and the screen will change slightly. Click on the Done button. The theme is now bound to the relevant server. You may proceed to the next section of this document.
Alternatively, if you did not bind the theme during its creation, you can do so after it is created by navigating to Configuration -> NetScaler Gateway -> Virtual Servers.
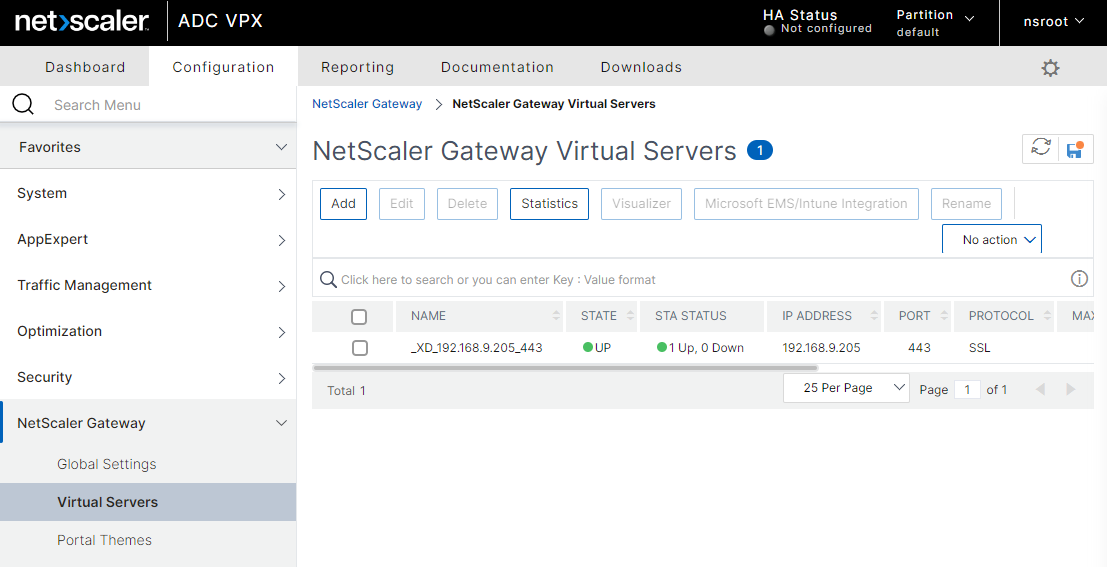
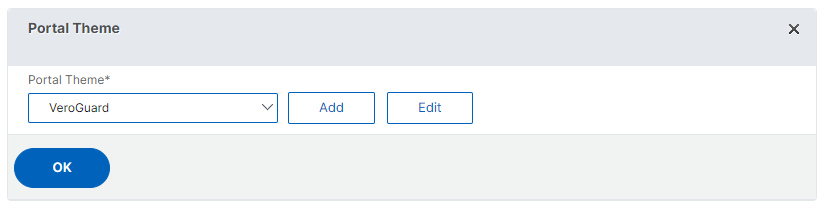
Click on the virtual server and then select the theme created above under Portal Theme and click the OK button.
Installation Part 2: Transferring Files to the NetScaler
To transfer the files, you will need access to an application capable of pushing arbitrary files to an arbitrary destination on a host. Some examples of such applications include:
the cli tools “scp” and “sftp”, both of which are available on Windows 10 and higher as well as most modern distributions of POSIX-like operating systems (including *BSD, GNU/Linux and MacOS)
the cli tool “rsync”, which is available on POSIX-like operating systems (or in Windows using Windows Subsystem for Linux)
The graphical tool WinSCP, which is available for Windows only (although similar tools exist for other operating systems).
Unzip “NS14 VeroGuard Package.zip” to a temporary directory. Your temporary directory should contain 3 files, namely serenity.min.js, appConfig.json and plugins.xml.
You will need to copy:
serenity.min.js and appConfig.json to the
/var/netscaler/logon/LogonPoint/plugins-ns-gateway/directory on your Netscaler, andplugins.xml to the
/var/netscaler/logon/themes/<custom_theme>/directory on your NetScaler (where “<custom_theme>” is the name of the theme created above).
The following instructions focus on achieving the goal of copying these files using the “scp” command in Windows. The precise syntax provided will likely only work for this specific tool in this OS. Please modify the syntax as appropriate for your chosen transfer tool and /or operating system.
Open a command prompt.
To copy the serenity.min.js and appConfig.json files to
/var/netscaler/logon/LogonPoint/plugins-ns-gateway/ type
scp "file_path\serenity.min.js" "file_path\appConfig.json" user@gateway:/var/netscaler/logon/LogonPoint/plugins/ns-gateway/where:
"gateway" is the NetScaler ADC VPX device IP
"user" is the name of an administrative user
"file_path" is the temporary directory where you stored the files from the ZIP file in step 1.
For example, if your temporary directory is “C:\Temp”, your NetScaler ADC VPX IP is 192.168.1.254 and you are using the default admin user "nsroot", you would type
scp "C:\Temp\serenity.min.js" "C:\Temp\appConfig.json" nsroot@192.168.1.254:/var/netscaler/logon/LogonPoint/plugins/ns-gateway/
You will see screen similar to the following:
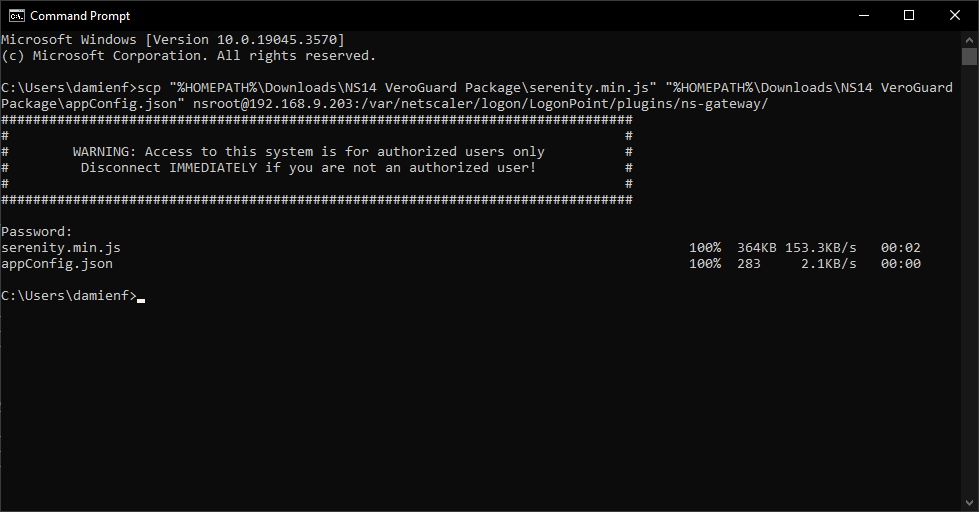
Enter your password when prompted. This will cause the files to be transferred.
To copy plugins.xml to
/var/netscaler/logon/themes/<custom_theme>/type:
scp " file_path \plugins.xml" user@gateway:/var/netscaler/logon/themes/<custom_theme>/ where:"
"gateway", "user" and “file_path” have the same meaning as in step 4 above, and
"<custom_theme>" is the name of the custom theme you bound to the server in section 1.2 above.
For example, if the custom theme is named “VeroGuard” (and all the other variable are the same as in step 4 above), you would type:
scp "C:\Temp\plugins.xml" nsroot@192.168.1.254:/var/netscaler/logon/themes/VeroGuard/
You will again be presented with a screen similar to the following:
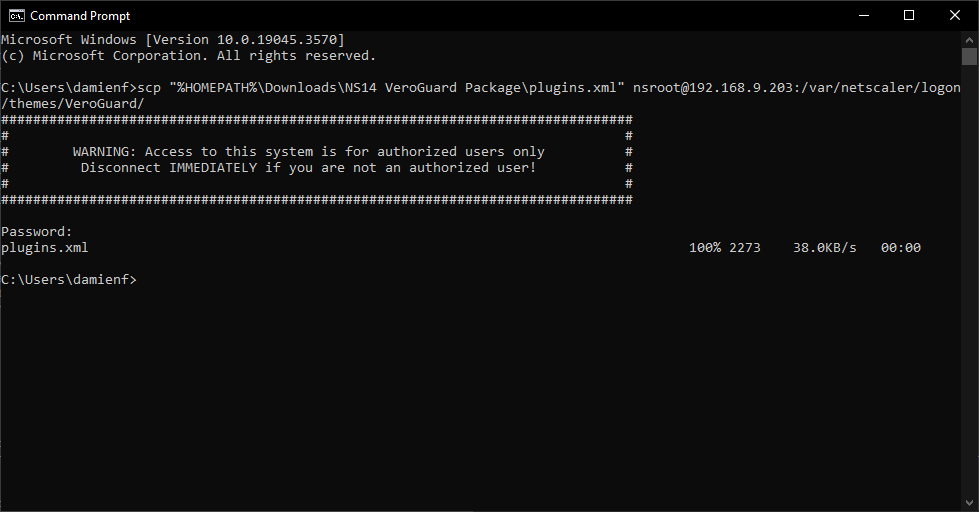
Enter your password when prompted. This will cause the file to be transferred.
Installation Part 3: Reboot the NetScaler
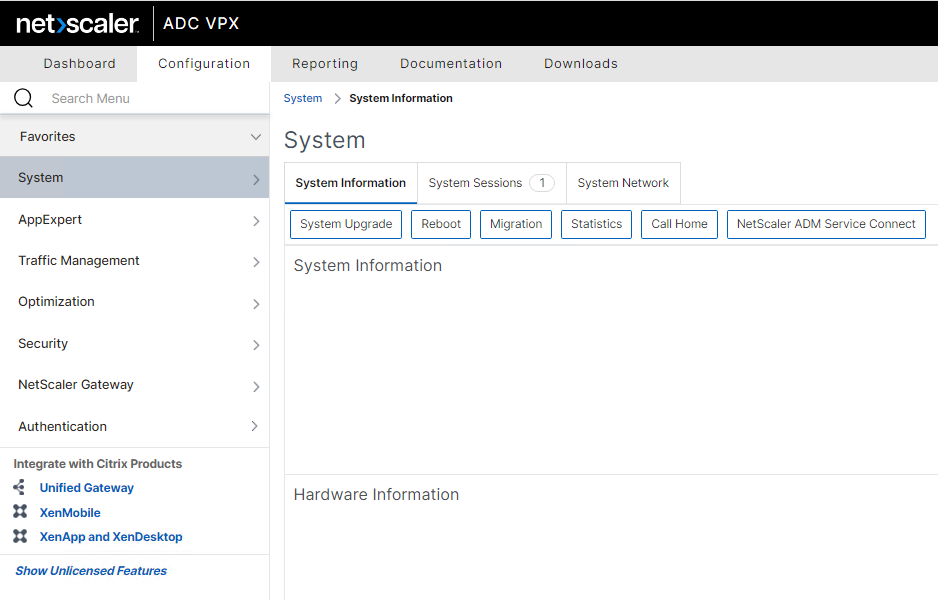
On the NetScaler Gateway administrative interface, navigate to Configuration ->System and click the Reboot button, as shown in the screen below:
You will be presented with the option to save the NetScaler configuration as shown in the screen below:
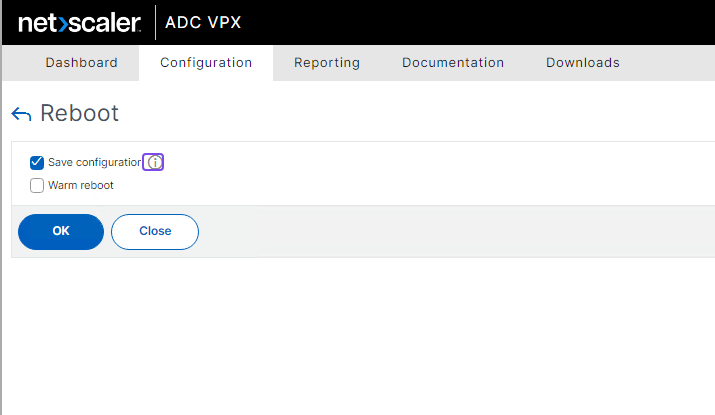
Ensure that the Save Configuration box is ticked, then click on OK to reboot the system.
The VeroGuard login option should now be active on the relevant StoreFront. If you do not see the VeroGuard login option, this may mean the previous theme is cached. Ensure that you close all windows / tabs with existing StoreFront browser sessions on your computer and open a new window or tab to initiate a new session.
Rollback Steps
In the NetScaler Gateway administrative interface, navigate to Configuration > NetScaler Gateway > Virtual Servers and click on the Virtual Server.
Change the Portal Theme drop-down option back to RfWebUI. Click OK to apply the change.
Optionally, remove the following files and the Custom Portal Theme created in the installation steps above.
/var/netscaler/logon/LogonPoint/plugins/ns-gateway/serenity.min.js/var/netscaler/logon/LogonPoint/plugins/ns-gateway/appConfig.json
Save the NetScaler Gateway appliance configuration.
Reboot the NetScaler Gateway appliance.