
Pre-conditions
To End users must be in possession of a Keyek Card and have been onboarded with a KeyekID.
Keyek Integration Instructions
Entra AD Setup
-
Sign into your Azure portal as an administrator.
-
Browse to Microsoft ID Entra > Security > Authentication methods > FIDO2 Security Key (Preview).
-
Under the method FIDO2 Security Key, set the following options and save the configuration:
-
Enable - Yes or No
-
Target - All users or Select users
-
Enforce attestation – set to No
-
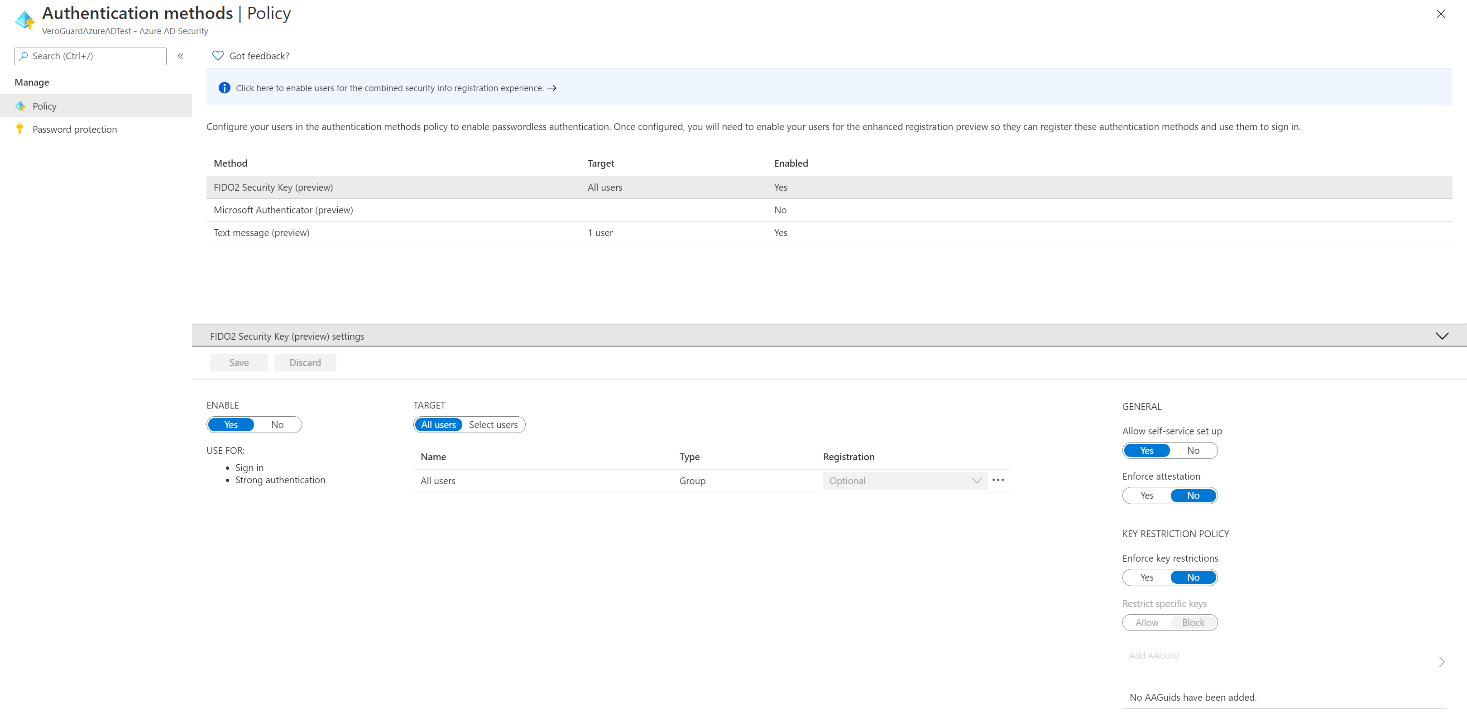
Entra Azure AD setup screen
Prepare End User Devices
Setting up User Devices
End user devices require the latest Microsoft operating system and Keyek Companion Service. If the device you are preparing does not have Bluetooth, please install the USB BT adaptor provided with the Keyek Card when completing end user set-up.
Update all Devices to 20H2 (minimum)
Hybrid Azure AD joined devices must run Windows 10 version 2004 or newer.
Serenity Companion Service
Run the Serenity Companion installer package which will set the service to run in the background, enabling the Keyek Card to securely communicate with Keyek via the PC’s Bluetooth connection. You can find the installer at Downloads section.
If Windows defender or your Antivirus software shows an alert, please select the option to Install anyway.
The Serenity Companion installer will enable security keys for Windows sign-in as described in the Microsoft technical articles by adding the following key to the registry during installation:
Computer\HKEY_LOCAL_MACHINE\SOFTWARE\Microsoft\Policies\PassportForWork\SecurityKey - UseSecurityKeyForSignin – REG_DWORD = 0x00000001
Connecting and Activating Keyek Card
The following sections can be completed by end users; however, certain tasks, such as setting a PIN, must be done by the end user only. Users can refer to the Keyek Card User Guide for assistance. For more information on this, refer to Set your PIN section.
Before a Keyek Card can be used for authentication, it must be paired with a PC. Pairing the Keyek Card follows the same procedure as pairing any other Bluetooth device and requires passcode confirmation for added security.
Activation is the process by which Keyek links the device to the Keyek Platform, ensures its security status, and allows the end user to set their secret PIN.
When you first power on your Keyek Card, it will display the message Ready for Activation below the Keyek Card number.
The Keyek Card keypad is deactivated while it is on the charger. Make sure to remove your Keyek Card from the charger when performing any activities. You can return it to the charger in between if needed.
Pairing a Keyek Card with the PC
-
Go to Windows Settings > Bluetooth.
-
Turn on your Keyek Card.
-
Click Add Device and the first option Bluetooth to initiate a search for available Bluetooth devices.
-
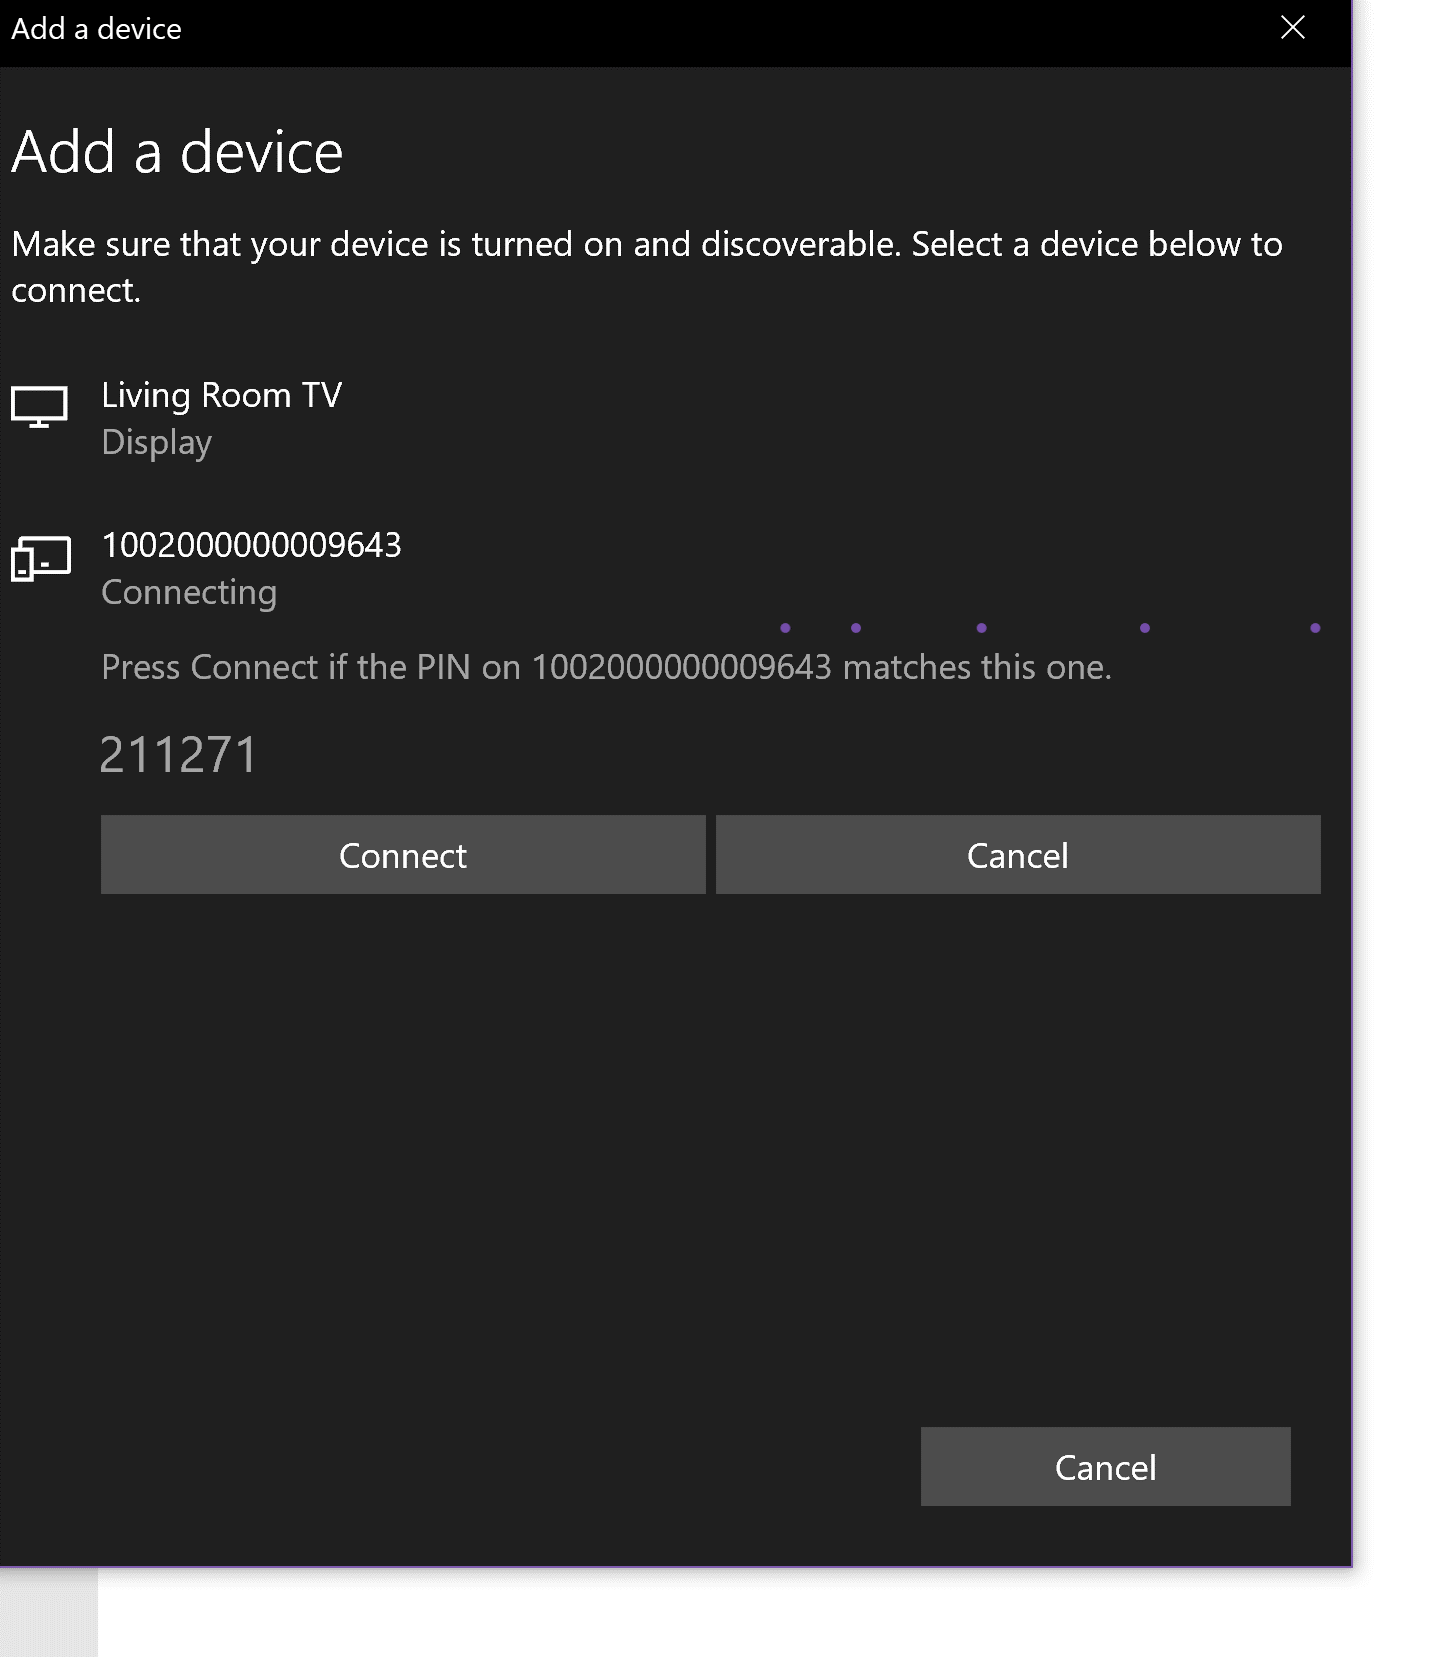
In the results view look for a 16-digit number in the list e.g., 1002000000009643 and click on the device name with your mouse (see Add a Device Screen).
-
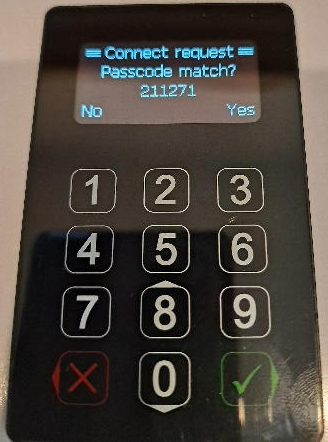
The screen on both devices will now display a compare passcodes and confirm message. Click Connect on the PC and touch the green “tick” on the Keyek Card.
|
|
Add a device screen and Keyek Card compare passcode confirmation screen
If the end user device does not have Bluetooth, please install the USB BT adaptor provided with the Keyek Card.
Activating a Keyek Card
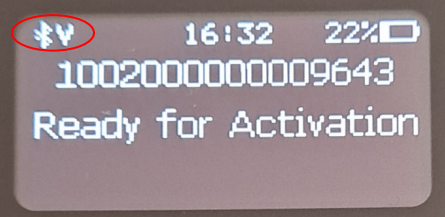
Until it is activated your Keyek Card will display the message “Ready for Activation” below the Keyek Card number. Once Serenity Companion is installed and your Keyek Card paired, the PC will connect to the paired device whenever they are in range and switched on. This is indicated on the Keyek Card by the Bluetooth icon (indicates Bluetooth connection is present) and the “V” icon showing connection to Keyek.
-
Confirm the Keyek Card is connected correctly by viewing the BT and V icons.
-
Navigate to the Activate command by pressing 0-5-3.
For more information on using your Keyek Card and navigation, refer to the User Settings and Basic Navigation section.
-
The Keyek Card will display Activating. Follow the prompts on the Keyek Card to complete the process and create and confirm your PIN.
-
Once successfully activated the Keyek Card will display Ready to Vero .
To activate a Keyek Card you must be connected to Keyek. If you do not see the “V” icon, check your internet connection. For more information on setting a secure PIN, refer to Set your PIN section.
Register your Keyek Card to your “Sign in” Account
This final setting requires the end user to login to their Microsoft account online and add the Keyek Card as a security device to their profile.
-
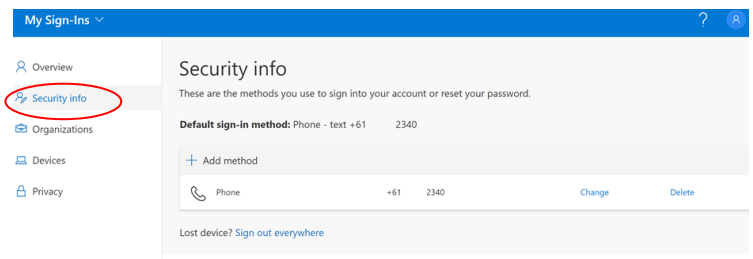
End users need to browse to https://mysignins.microsoft.com and sign-in (if not already) with their Windows username and password.
-
Click Security info.
If the user already has at least one Azure AD Multi-Factor Authentication method registered, they can immediately register a FIDO2 security key. If they do not have at least one Azure AD Multi-Factor Authentication method registered, they must add one.
-
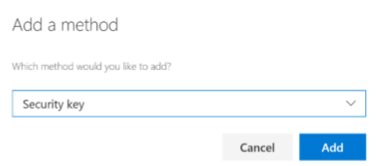
To add a FIDO2 Security key, click Add method. The Add a method screen opens up.
-
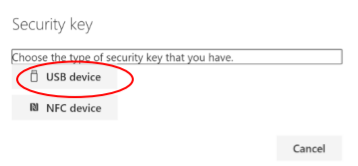
From the Which method would you like to add menu, choose Security key and click Add. The Security key window opens up.
-
Click on Choose the type of security key that you have menu. From the drop-down choose USB device.
This will try both USB and Bluetooth BLE that supports Keyek Card.
-
Make sure your Keyek Card is turned on and ready and choose Next. The browser will connect with and register the device against your account.
-
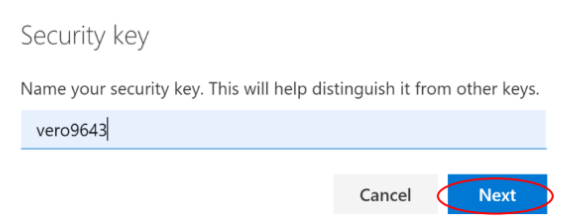
The user will be returned to the combined registration experience and asked to provide a meaningful name for the key so the user can identify each if they have multiple. Click Next.
-
Click Done to complete the process.
Login to your Device
-
Power up, log out of your device or return to the lock screen (WIN+L).
-
On the screen select Sign-in Options or if already displayed click the FIDO security key icon, and the message will change to request you to Turn on your Bluetooth security key or insert it into the USB port.
-
Turn on your Keyek Card and once connected it will display available accounts.
-
Select your account.
-
If multiple accounts exist, select account using up/down (8/0).
-
Click the green tick to select.
-
Enter your PIN on the Keyek Card when prompted.
-
Once you have completed an online login, the same login process can be used when offline.