.svg)
Add a Resource
You now need to add a Resource to the User. Every Application has a set of rules, attributes, and parameters to operate. These attributes and parameters are referred to as Resources. Every Resource has a Uniform Resource Identifier (URI) reference attribute, which is used as an account identifier. Each Application can have one or more resource with different Resource attributes.
This section provides guidance on how to add resources. These resources are essential for administrators to effectively manage user access and enhance security protocols within the organisation.
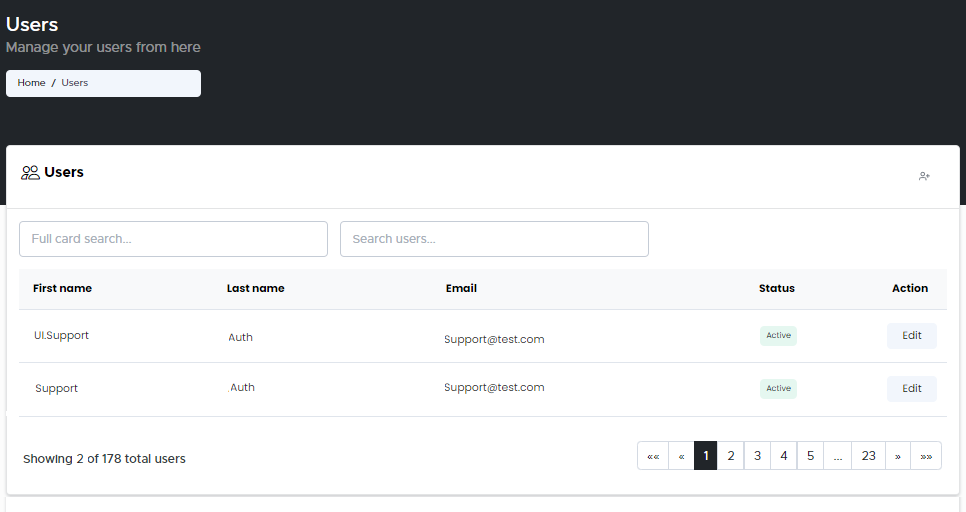
From the Home page, click on Users option. The Users - Manage your users from here page opens up displaying all the list of existing users.
or
In the Home page, go to the Users option from the left navigational pane and click on it. The Users -
Manage your users from here page opens up displaying all the list of existing users.
Users Initial Page
In the Search Users field, type the name of the user you want to search and the list of the searched users are displayed.
Click Edit to navigate to the Users records. The User’s Account Management page opens up displaying the Users info.
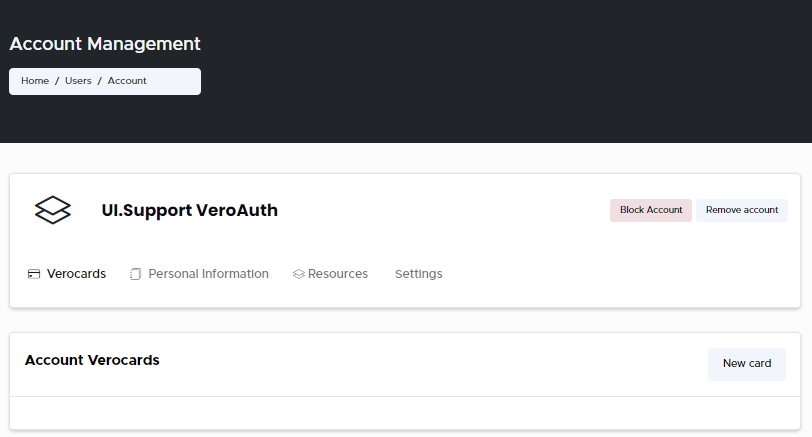
Users Account Management
Go to the Resources tab and click on it. The Resources details page opens up displaying the list of all the existing resources added to the user.
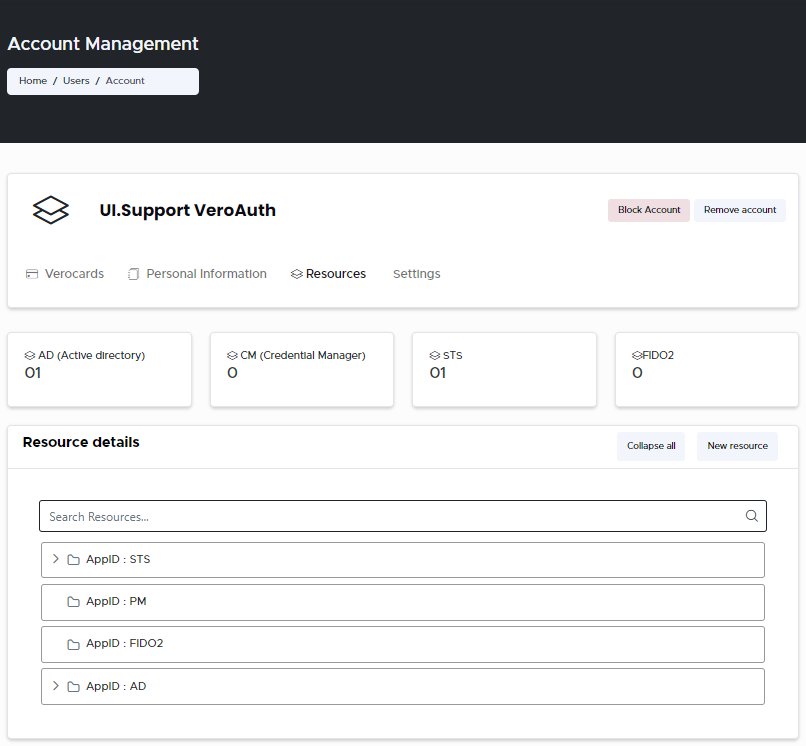
Resources Details Page
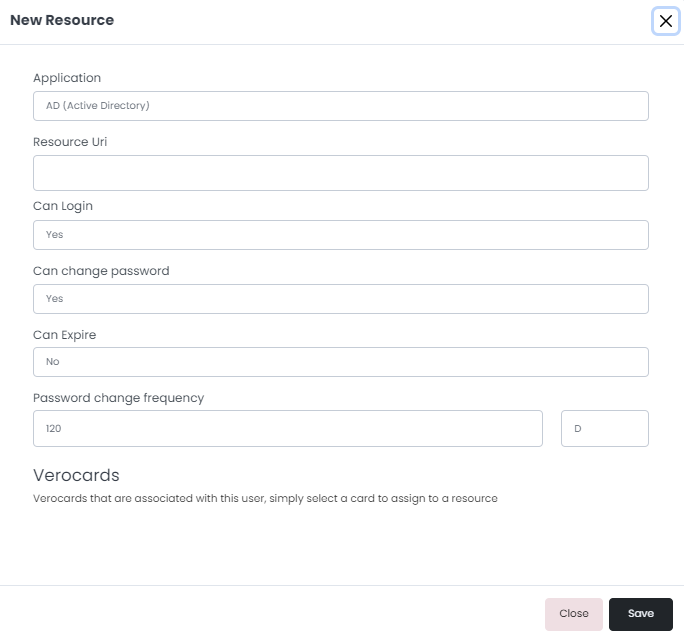
From the Resources tab, click on the New Resource button to add a new resource. The New Resource page opens up. By default, the AD (Active Directory) resource is selected.
Add a New Resource
Enter the relevant information to add a new resource.
Application: From the drop-down, select the applications - Active Directory (AD), Secure Token Service (STS), FIDO2, or CM you wish to add. The relevant Resource screen opens up.
Add an AD Resource
This application is related to the functionality of AD Login and allows the Users to login to Microsoft Windows with their VeroCard.
Follow the steps from 1 - 6.
Active Directory Resource
In the New Resource window, enter the necessary details in the required fields.
Resource Uri: Enter the URI of the Active Directory used to identify the resource. Usually it is 'sAMAccountName' and FQDN. ie jhond@test.local
Can Login: Choose Yes or No option from the drop-down menu.
Yes: Windows login will work
No: User will not be able to login (using Active directory).
Can Change Password: Choose Yes or No option from the drop-down menu.
Yes: Choose Yes, to allow system to change password automatically based on 'Password Change Frequency'.
No: Choose No, will disable change password by the system.
Can Expire: Choose Yes or No option from the drop-down menu. Controls whether password will be reseted or expired.
Yes: It will expire the password and will NOT reset password when 'password change frequency’ duration is expired.
Password Change frequency: Enter how often you would like to change the password. It is defined as number followed by unit. Valid units are ‘s' (seconds), ‘m' (minutes), 'h' (hours), 'd' (days). Default is 'd' . eg; '120 m’ '360 d’ etc
VeroCards: From the list of VeroCards displayed select a card you wish to assign to a resource.
The URI must be the email address using the sAMaccount name and FQDN for the domain
Add an STS Resource
This application is related to the Web application login using OAuth (OpenID connect) and allows Users to login to websites with their VeroCard.
Follow the steps from 1 - 6.
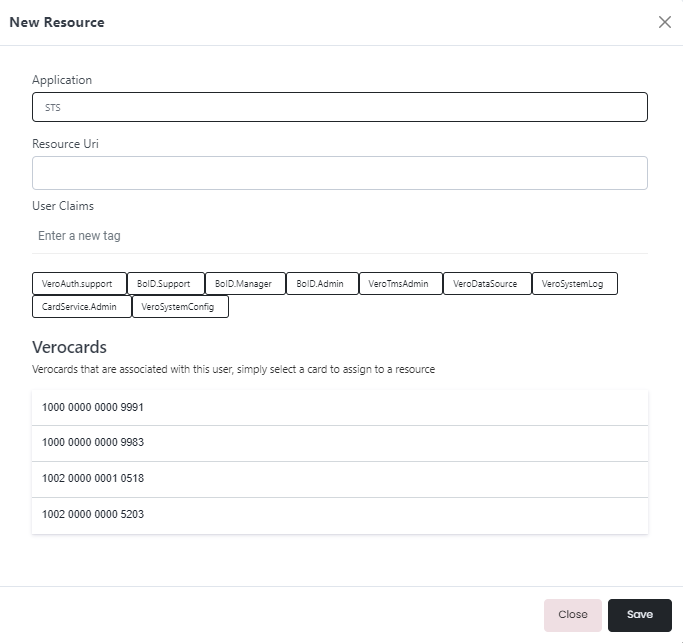
New STS Resource
In the New Resource window, enter the necessary details in the required fields.
Resource Uri:
Enter a new tag: Enter a new tag or click to choose from the list of tags displayed.
VeroCards: From the list of VeroCards displayed select a card you wish to assign to a resource.
Add a Fido 2 Resource
This application is related to Web application login using a hardware key. Also allows login to Windows using AZURE AD.
Follow the steps from 1 - 6.

Add a New FIDO 2 Resource
In the New Resource window, enter the necessary details in the required fields.
Resource Uri: Enter the URI of the FIDO2 used to identify the resource.
VeroCards: From the list of VeroCards displayed select a card you wish to assign to a resource.
Click Save. The New Resource added will be listed in Resource Details section.