.svg)
Log in to an AD On-Premises Network PC with VeroCard
Logging into a PC with a VeroCard is similar to the traditional method but uses a PIN instead of a password. Follow these steps to log in using your VeroCard:
Switch on your Windows 10+ device (PC) as you normally would and wait for the screen to display the logged-in account. The Card Selection Box will show your VeroCard number or nickname. If the system detects multiple VeroCards, select yours from the drop-down.
VeroGuard will automatically assign a nickname to your VeroCard after your first log in.

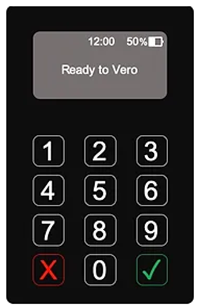
Press the power button on the top left edge of the VeroCard. Wait a few seconds for it to complete the boot-up process. Once ready, it will display Ready to Vero.
Press Enter or click the arrow icon next to the VeroCard number on the PC to begin connecting the VeroCard to the PC. VeroCard displays the prompt to Enter PIN.
Enter your PIN using the VeroCard keypad and press green tick key. If the validation is successful, the VeroCard displays the Success message.
The PC screen will update to Welcome and log you in.