.svg)
Register VeroCard as FIDO Authenticator Win10
Register your VeroCard to your "Sign in" account
This final setting requires the end user to login to their Microsoft account online and add the VeroCard as a security device to their profile.
Browse to https://mysignins.microsoft.com and sign-in (if not already) with your Windows Username and Password.
You will be required to setup at least Azure AD Multi-Factor Authentication method (if you do not already have one) before you can register a FIDO2 security key.
Click Security Info.
If the user already has at least one Azure AD Multi-Factor Authentication method registered, they can immediately register a FIDO2 security key. If they do not have at least one Azure AD Multi-Factor Authentication method registered, they must add one.
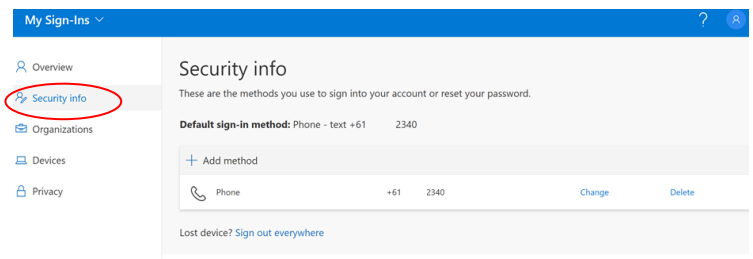
Security Info Screen
To add a FIDO2 Security key, click Add method. The Add a method screen opens up.
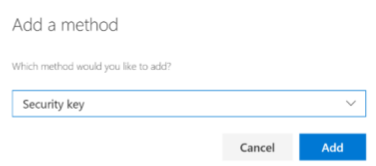
Add a Method - Security Key
From the Which method would you like to add menu, choose Security key and click Add. The Security key window opens up.
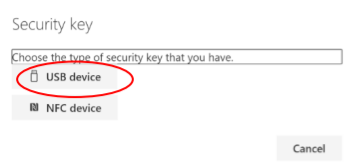
Security Key - USB
Click on Choose the type of security key that you have menu. From the drop-down choose USB device.
This will try both USB and Bluetooth BLE that supports VeroCard.
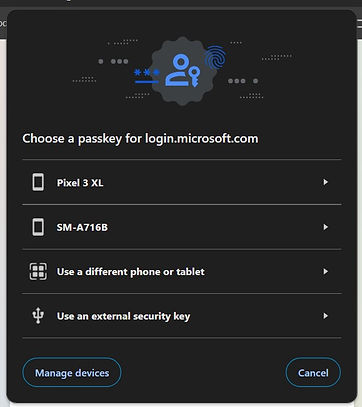
Make sure your VeroCard is turned on and ready and choose Next. The browser will connect with and register the device against your account.
From the popup window choose Use an external security key. Windows will then display 2 pop up messages for you to confirm - Click Ok on both.
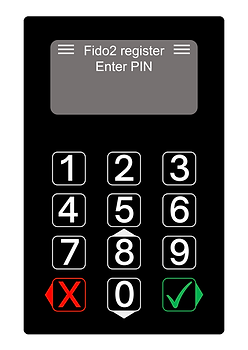
Once the PC connects to the VeroCard it will display Fido2 Register and you will be prompted to Enter PIN. Enter your PIN and press the Green Tick.
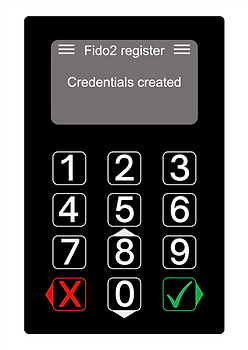
On success, the user will be returned to the combined registration experience and asked to provide a meaningful name for the key so the user can identify each if they have multiple.
The user will be returned to the combined registration experience and asked to provide a meaningful name for the key so the user can identify each if they have multiple. Click Next.
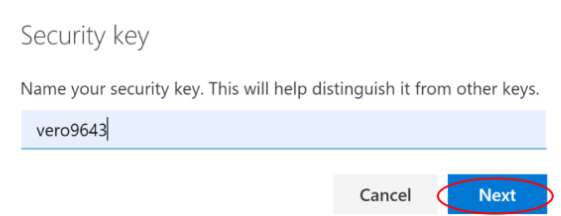
Name your Security Key Screen
Click Done and complete the process.
10. Your VeroCard is now ready to use for login. Login to your Azure AD connect network Device.