
To complete the activation process, there are three essential steps. Some of these may be handled by your IT team, so it’s a good idea to consult them for any guidance on the procedure.
-
Set up your PC
-
Pair your Keyek Card
-
Activate your Keyek Card
-
Register your Keyek Card
Additionally, ensure you register your Keyek Card with your Microsoft account. This applies to both Windows 10 and Windows 11.
Set up your Azure AD Connected PC
If your company’s IT administrator has not set this up for you, you will need to follow the below steps.
Your Windows 10 PC requires the latest Microsoft operating system and Keyek’s Keyek Companion Service. If the device you are preparing does not have Bluetooth, please install the USB BT adaptor provided with the Keyek Card when completing end user set-up (simply plug it in.)
-
Manually run Windows Update and install if required
-
As 20H2 is currently a preview release the update will need to be manually requested.
-
-
Install the Keyek Companion Service
-
To download and install Keyek Companion click here. Please note that you may need administrator privileges depending on the setup of the device. If so, please speak to your IT Administration team. The Keyek Companion service is a background task (so you won’t notice any difference on your PC) which enables the Keyek Card to securely communicate with Keyek via the PC’s Bluetooth connection.
-
-
You can still access your device using your previous method (eg: password and 2FA )
-
Once you have successfully completed a Keyek Card login to a device, you can simply use your Keyek Card and PIN - you will no longer need a password!
Pair a Keyek Card with the PC
Keyek Cards require pairing with each PC before they can be used for logging into your user account. Pairing a Keyek Card uses the same procedure as pairing any other Bluetooth device and requires confirmation of the passcode for added security.
Activation is the process used by Keyek to link the device to the Keyek Platform, confirm its status remains secure and then enables the end User to set their secret PIN.
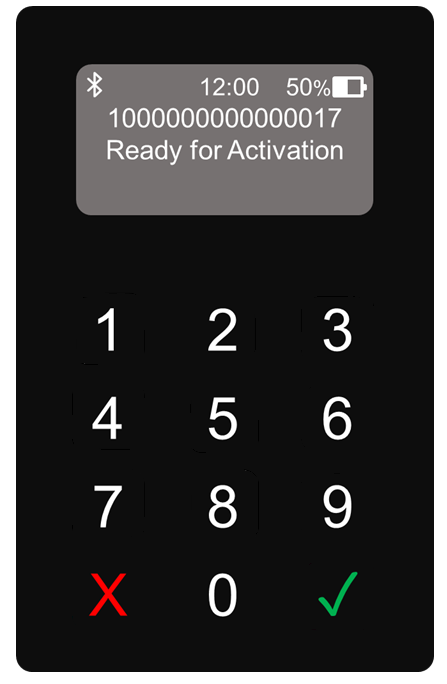
When you initially turn on your Keyek Card it will display the message “Ready for Activation” below the Keyek Card number. Users can access the Keyek Card user guide by clicking here.
-
Click Start and go to Settings and navigate to Bluetooth & Devices. Ensure Bluetooth is enabled on your PC.
-
Turn on your Keyek Card.
-
Click Add Device and the first option “Bluetooth" to initiate a search for available Bluetooth devices.
-
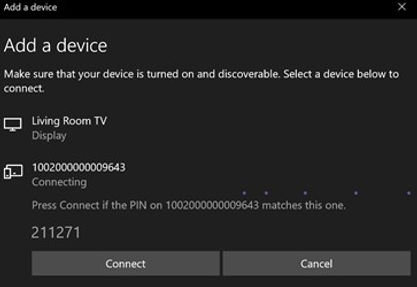
In the results view look for a 16-digit number in the list e.g., 1002000000009643 and click on the device name with your mouse.
-
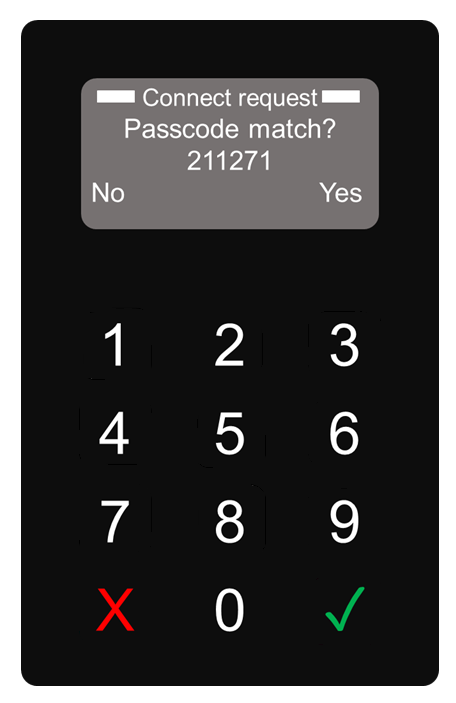
The screen on both devices will now display a “compare passcodes and confirm” message. Click Connect on the PC, and touch the Green “tick” on the Keyek Card.
Ensure Bluetooth devices discovery mode is set to Advanced.
-
Go to Settings > Bluetooth & Devices > Devices and scroll down to the Device Settings section. Click on the drop down under Bluetooth devices discovery and select Advanced.
|
|
|---|
Activate your Keyek Card
Until your Keyek Card is activated it will display the message Ready for Activation below the Keyek Card number. Once Keyek Companion is installed and your Keyek Card Paired, the PC will connect to the paired device whenever they are in range and switched on. This is indicated on the Keyek Card by the Bluetooth icon (indicates Bluetooth connection is present) and the “V” icon showing connection to Keyek.
-
Confirm the Keyek Card is connected correctly by viewing the BT and V icons You must have a connection to Keyek to complete your Keyek Card activation.
-
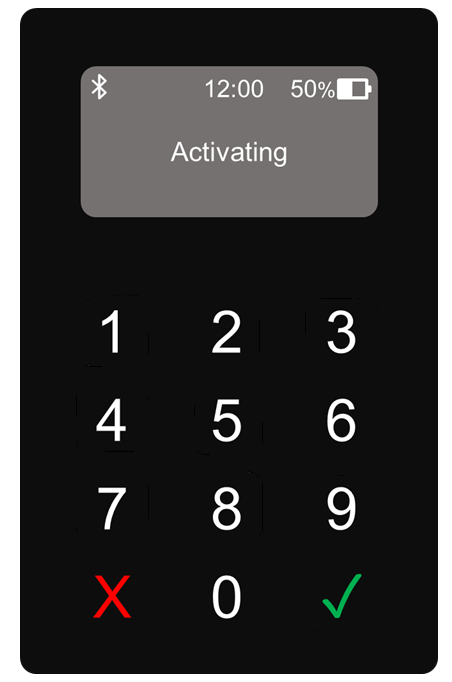
Navigate to the “Activate” command by pressing 0-5-3 (for more information on using your Keyek Card and navigation see the Keyek Card user manual by clicking here).
-
The Keyek Card will display “Activating”. Follow the prompts on the Keyek Card to complete the process and create and confirm your PIN.
-
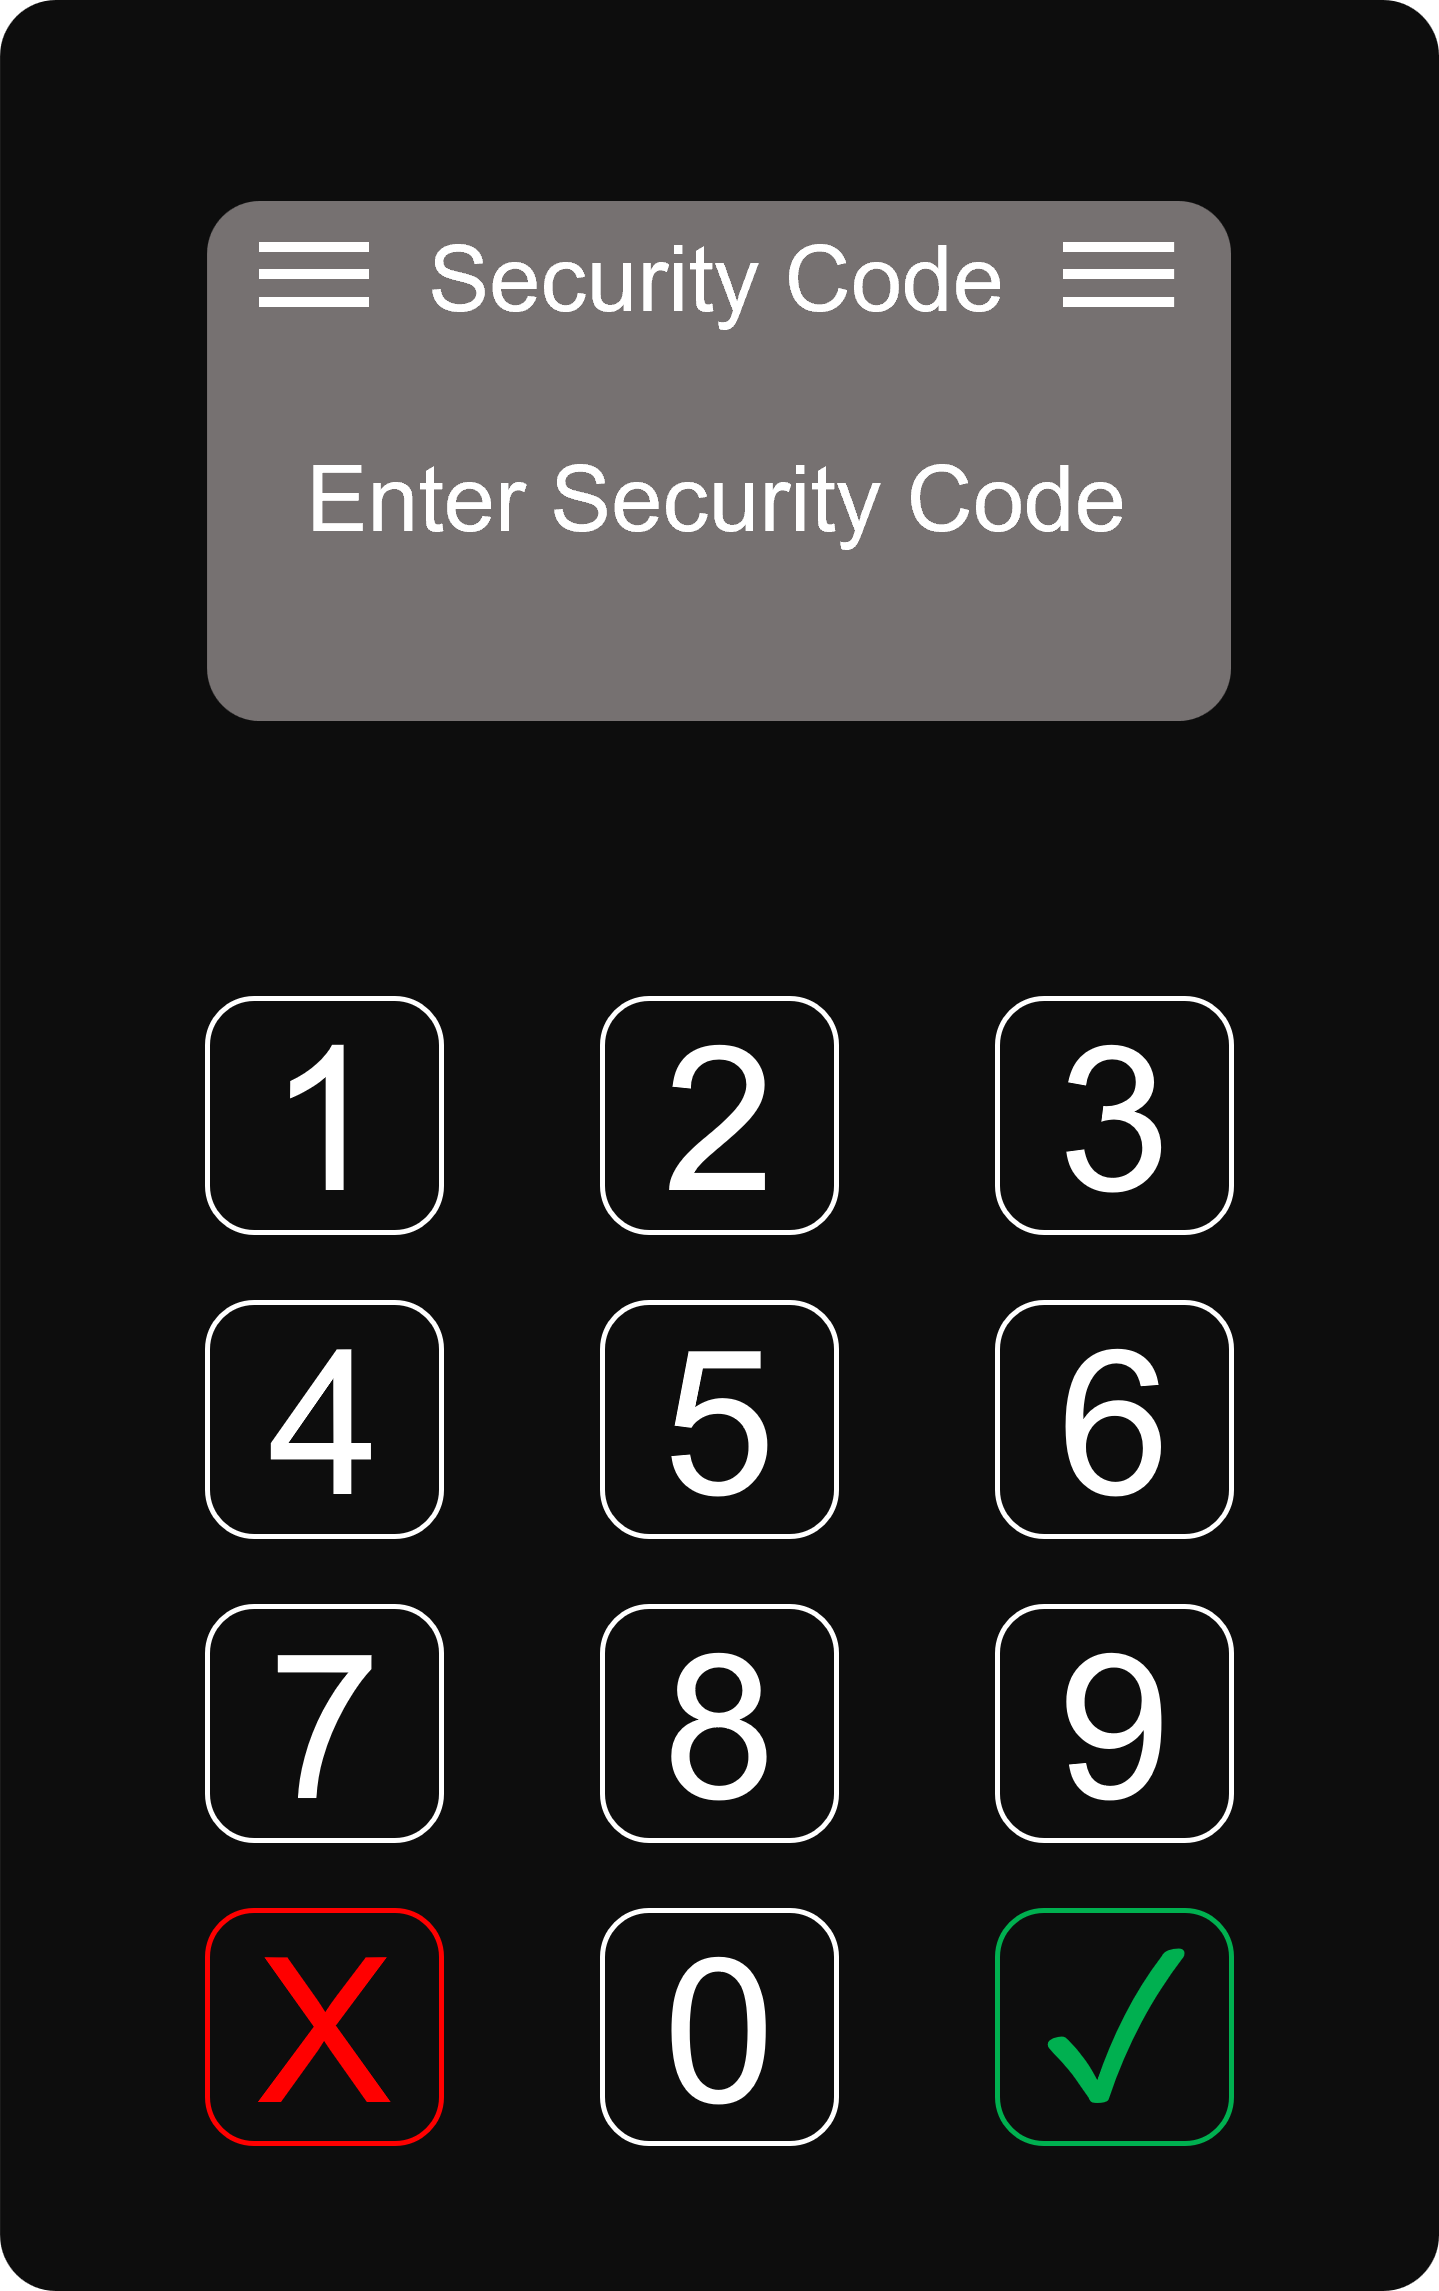
If you have been sent a one time Security Code the Keyek Card will display Enter Security Code.
-
The security code will be sent to your primary email address used to establish your KeyekID.
-
Enter the 12-digit security code and press the Green Tick.
-
If the Enter Security Code screen does not display - continue with step 5.
-
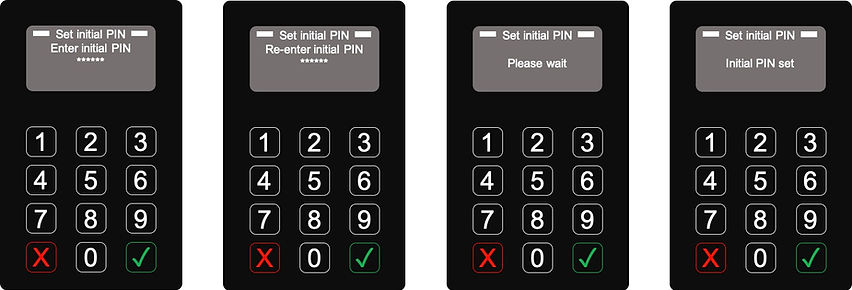
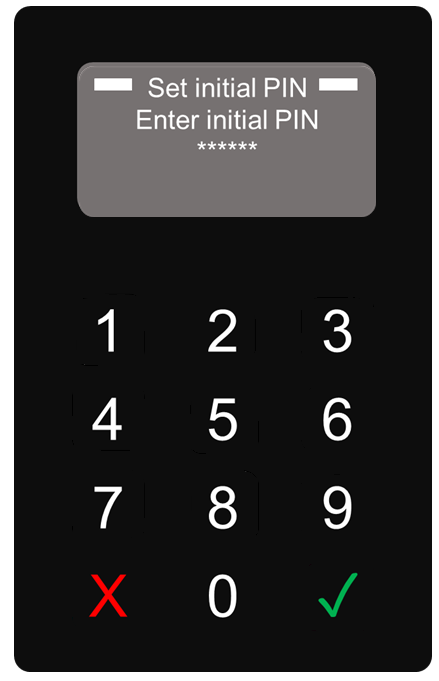
The Keyek Card will now prompt you to enter your PIN.
-
Enter your PIN and press the “Green Tick” to enter. Please read the article "A better PIN" here and select a PIN you can remember which is not easily guessed. The PIN length can be between a minimum of 4 to a maximum of 12 digits (ISO 9564), however we recommend you use a PIN of at least 6 digits. You will be asked to enter the PIN twice to make sure you type it in correctly.
-
The Keyek Card will restart to normal operation mode and display the ready screen.
To maintain system integrity, the Security Code is sent to the Platform for verification along with your initial PIN. If the Security Code is incorrect, you’ll need to repeat the process from Step 10, including setting your PIN.
-
If the Keyek Card software requires an update, this will be downloaded and installed first. During the process the Keyek Card will display progress messages. It is important to keep your PC or laptop active whilst this is happening to allow the Keyek Card to use the device’s internet connection.
-
Once completed, the Keyek Card will restart and return to the ready screen.
-
Your Keyek Card is now ready to use for login.
-
Register your Keyek Card on your Microsoft account. Please select your Operating System version below: