
Keyek Cards can be added to the portal and linked to a user automatically during the onboarding process. However, sometimes you might need to manually add a new Keyek Card to the portal and this will need to be carried out before you can link it to a user.
-
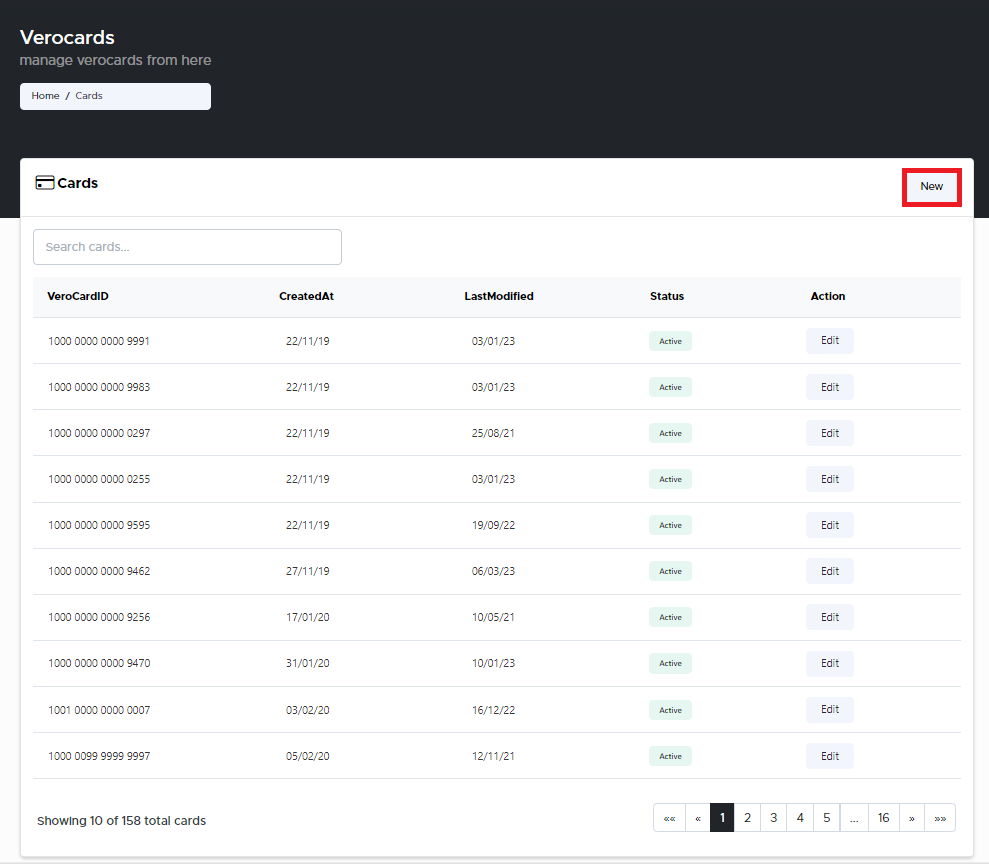
From the Home page, click on Keyek Cards to open the Keyek Cards - Manage Keyek Cards from here page displaying the list of existing cards.
-
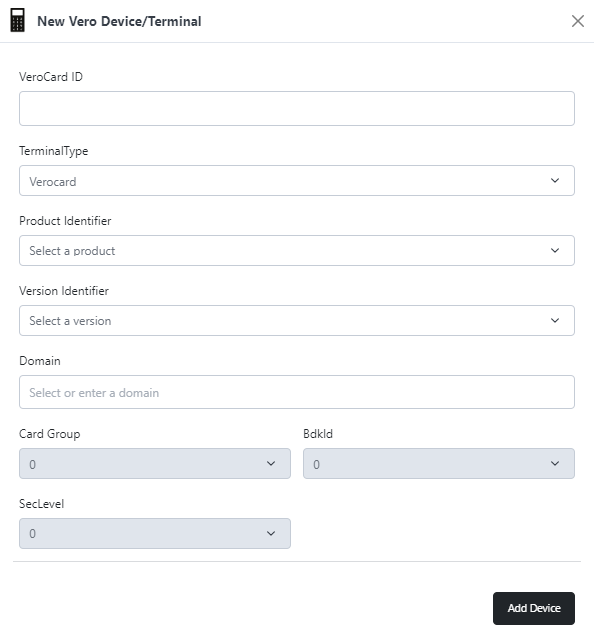
Click New if you wish to add new device. The New Device/Terminal window pops-up.
-
In the New Device / Terminal window, enter the following details:
-
Keyek Card ID: Enter the Keyek Card ID. Each Keyek Card has a unique ID number that can be found on the back of the Keyek Card. You can also find this number displayed on the device screen by pressing 0-1-3 on the Pin pad.
-
Terminal Type: Select Terminal Type “Keyek Card” from the drop-down menu.
-
Product Identifier: Select a Product from the drop-down menu.
-
Version Identifier: Enter the Firmware version number.
-
Domian: Select or enter the domain.
-
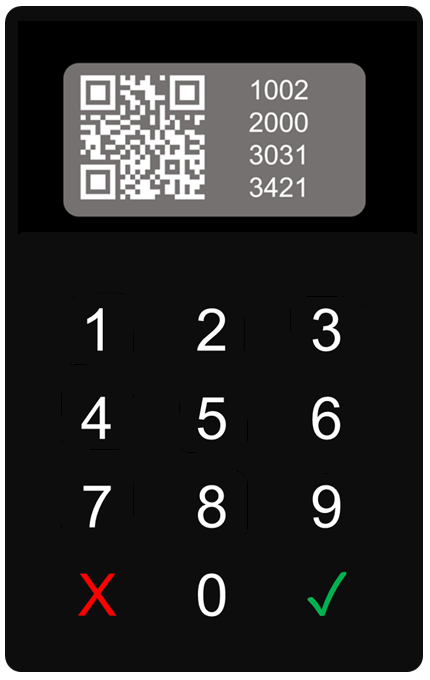
Keyek Card terminal ID can also be found printed on the Keyek Card box
-
Click Add Device. The Operation successful message is displayed if the card is added successfully.
Unless otherwise specified by your organisation it is recommended that you always run the latest firmware. If the existing firmware on the Keyek Card does not match the firmware version selected, Keyek will update the Keyek Card on connection to the platform.